
Video is fast becoming the preferred mode of data consumption. Based on an excerpt from the latest trends report by Forbes, over 500 Million people watch online videos daily, and video traffic would constitute 80% of all consumer internet traffic in the next four years.
Video content has become essential in online courses for an online course’s success. An engaging video is key to building trust with the participant. Trust that the content is high quality and worth the participant’s time and effort. Videos capture learners’ attention and help build interest in the content. It enables brainstorming, encourages forum discussions and catalyzes learning. An image of a diagram, pictorial, and text-based learning are all good learning tools; however, video-based learning has proven to be faster and aids assimilation. With the entire online content being video, the learner’s expectations have risen manifold.
That’s where the most significant challenge lies. Rising expectations from video presentations have made it highly difficult for online course creators. A common mistake that many course creators end up making is the direct conversion of an entire 60 minutes lecture into a video. By doing this, the video loses its essence, and learners become bored, stop watching, and end up getting distracted.
After deciding which course to create and what to teach, creating great videos is the next step. This article aims to act as a guide to show you how to create videos for online courses. Let’s quickly look at some great ways of creating a video:
Outline
An outline of the video is the first step in creating great videos. Even before you sit down to record the video, you need to decide on an outline that defines what you are going to talk about, how you are going to do it and what all visuals will be required. A brief outline directs the video and helps build visual cues while writing the narration/Voice for the video.
Match your Video content.
The next step is to decide how to integrate the video into the course most effectively, so it serves the end learning objective or learning goals. Simply making an entertaining video would grab the attention but would fail to go beyond that. Videos can be used for the introduction to the course, as a summation tool or even during the course for detailed discourse. However, it should never be an afterthought. Like in scriptwriting, where a writer writes the script keeping the end in mind, one needs to keep the videos in mind while writing down the structure of the course.
You can start creating the video once the structure is ready. You should record professional quality HD videos with no background noise, perfect Lighting, seamless editing etc. This might seem like a daunting step. However, it is easy if you break it down into smaller steps.
Scene Setup
You need a space with the least amount of distractions. A place with solace so to speak, where you can be your best and has great visual appeal. If you don’t have access to such a place, a simple neutral colour background will do as well.
If you plan to edit the video via video editing software, a green-coloured standee is preferred as it makes video editing easy, and you can change the background as you choose. Ensure you don’t wear anything green or blue as the Green and Blue colours in outfits are also picked up by the software during video editing.
Lights

The 3-point Lighting is an industry standard for video shooting. The 3 Point Lighting highlights the face and helps the Camera capture facial expressions and other visuals beautifully. The first light aims directly at you, and the other two fill in the shadows that objects create.
While the 3-point Lighting is relatively easy to set up, 3 warm lights aiming heat at you can be discomforting for some. Hence even a 2 Point light setup can do the trick as long as it’s set up well to avoid shadows being captured prominently by the Camera. The Camera loves Lighting; it also makes you look great on-screen.
Video Creation
There are primarily 3 types of videos that can be used for the online learning experience.
- Flipped Videos
- Tutorials
- Multimedia
Flipped Videos
Video Lectures are known as flipped videos and are commonly used for Online education as they eliminate the need for a face-to-face session. For this purpose, enough high-end cameras can help make some great videos. However, if you wish to make some on a dime, here are some less expensive alternatives.
Most point-and-shoot cameras under Rs 20,000 (roughly $300) can shoot amazing videos. Nikon Coolpix, Canon Powershot, and Sony Cybershot series do a wonderful job of capturing some crystal clear videos and even reducing background noise from the video if any.
However, if you wish to make some videos with a low budget, you can try using phone cameras as they are pretty good for close-up shooting as well. Try these options, and you may decide which tool has the best Camera for your Videos.
Tutorials via Screencasting
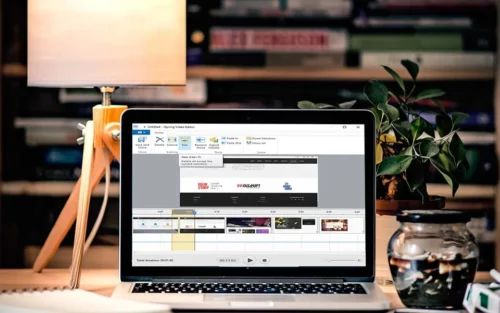
is a free powerful tool that’s a must-use for Screencasting. Primarily used for creating and editing videos based on screen capture, one can also make a recording of your entire screen, a selected area of the screen, or a single window.
This enables the creation of how-to videos or sharing of content via PowerPoint presentations. Relatively easy to use, iSpring helps create HD quality videos, adds background music and voiceovers with volume adjustments, fade-in or fade-out effects, has options for deleting unnecessary parts and even has a background noise removal option for narrations which is an excellent add-on from this software. iSpring
Multimedia based Videos
Camtasia is a software suite well known for creating multimedia-based video tutorials and presentations directly via screencast or a direct recording plug-in to Microsoft PowerPoint. While the licensed product for $199 works great, its free version with a 30 days trial period also has enough power tools to help you create videos where you can record your screen, make edits to the video, and add animation & effects with a simple drag and drop onto the timeline.
You can record mouse movements, add notes & annotations, add multimedia to PowerPoint and even create interactive quizzes as part of the video to enhance student learning and engagement. How to best use Camtasia for editing your videos. Click here to learn.
Lapel Mic
Also known as a Collar Mic, a Lapel mic gets attached to your belt and lapel and stays pretty close to you. This ensures optimal recording quality with low background noise. We recommend a lapel mic which costs approximately Rs 4500 ($70) or a Rode SmartLav+.
Soundproofing
If iSpring’s background noise removal option does not do the trick, soundproofing forms must be used to eliminate any background noise at the time of recording the voiceovers and record high-quality audio. These are great for removing any or all sounds and enable you to record your narrations with a pin-drop silence.
Available on most online platforms, soundproofing panels are a great way of creating a mini space for yourself that acts like a soundproof wall that absorbs all sound and enables noise-free recording.
Available for a low cost, this is an absolute must as most audio editing software is pretty expensive though they too can aid in removing background noise. However, these panels are the way to go solely to eliminate background noise.
Editing
On the lines of how iSpring Works, Windows Movie Maker is another great tool specifically designed for creating simple yet elegant videos for the novice.Not only is the tool-free, but it also has a great UI that makes Video editing easy.
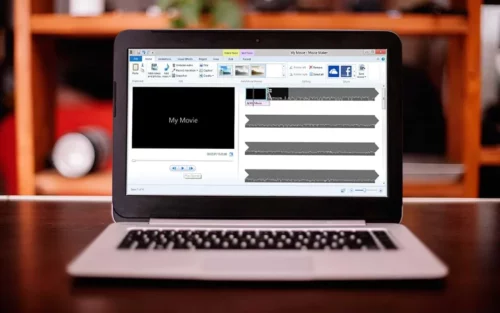
The Movie Maker has enough power in it to render videos based on your needs. It can make HD videos and formats that are smaller in size as well, which can well be used for previews or sharing as well. With a simple Drag and drop format, you can cut videos, edit parts you don’t like, add music to particular sections and even add narrations wherever you like in the video, checking how the layers work together. Once perfected, you can then download the videos in an HD Mp4 format for use in the online course. If you wish to learn how to use windows movie maker, click here.
Following the steps above can help you with the videos you need. However, keep two points in mind:
Video Duration
Once you have created an outline of what you want to teach, break the session into smaller sections. You can then create videos of these smaller sections and place them in order in the course.
Be Yourself
There’s no better advice we can share with you. There’s no need to present a different version of yourself or try hard to impress the audience. Additionally, if you make a mistake or end up sharing the wrong information in the video, you can course-correct yourself. You can re-record the video or simply admit the error and correct the information. The second bit builds trust and worth.
Whether you’re narrating slides, Screencasting, or creating animations, it’s a great time to add video production to your learning capabilities.


